A Simple Guide for You!
Do you want to make cool shapes? Do you want to copy things you like? You can! Making silicone molds is fun. It is like playing with magic clay. This guide will show you how to make silicone molds. It is easy. Even if you are new, you can do it! This is a step-by-step mold-making guide. We will learn DIY silicone molding techniques. No fluff, just the fun stuff!
Why Make Your Own Silicone Molds?
Making your own silicone molds is great!
- You can copy almost any shape.
- Make molds for resin art. Like for silicone mold for jewelry resin.
- Make molds for candles. Use a silicone mold for candle making.
- Make molds for soap. Try a silicone mold for soap crafting.
- Make molds for yummy chocolate! Use food-grade silicone molds.
- Make molds for concrete or plaster casting 1. See how to use Silicone for Concrete&Stone Molding.
- Make molds for pottery or even GRC/GRG/GFRC Molding.
- It can be cheaper than buying molds. It is an economical mold-making method.
- You can make custom resin molds no one else has!
- It helps with silicone mold prototyping.
- You can even make silicone caulk molds for small things.

What You Need: Tools and Supplies
Let’s get our mold-making tools and supplies ready!
Stuff You Need:
- Silicone Rubber: This is the main stuff.
- Two-part silicone molds use two liquids. Mix them! Platinum-cure silicone is safe for food. It captures tiny details well . It has a low shrinkage rate . Brands like Smooth-On make this. Check out their Dragon Skin or OOMOO series. Topsil Silicone also make good silicone with high performance cost. Polytek and Dow Corning are other big names. You can find low-viscosity silicone rubber for tricky shapes. LifeCasting uses special skin-safe silicone. Look for Pourable Silicone like the Sorta-Clear series or Mold Max products.Tin-cure silicone is cheaper. Good for practice or things not for food .RTV silicone molds mean Room Temperature Vulcanizing. It cures without heat.
- You can even try silicone sealant from a tube with a silicone caulk gun for a super budget-friendly silicone materials option, like the silicone caulk molds method.
- Thing to Copy (Master Model): This is the item you want a mold of. Make sure you do good master model preparation. Clean it well! You can use 3D Printed Masters . Even things made from Chavant Clay or Sculpey work.
- Mold Box: A little wall to hold the liquid silicone.
- You can use cardboard strips. Glue the edges well .
- Foam core from Staples works too.
- Lego bricks are fun!
- Thermoplastic sheets make sturdy boxes.
- Even an empty Pringles can works for round things!
- Use clay walls for mold boxes if you like.
- Mixing Cups and Sticks: To mix the silicone parts. Use disposable measuring cups.
- Mold Release Agent: A spray like Mann Ease Release 200 or Stoner brand helps the mold come off easily. Mold release agent application is important!
- Digital Scale: To measure silicone parts just right. Silicone rubber mixing ratio is key!
- Safety Stuff:
- Nitrile Gloves: Keep your hands clean.
- Ventilation Masks: Some silicone smells strong. Protect your lungs with mold-making safety precautions.
- Optional Cool Tools:
- Vacuum Chamber: This machine sucks out air bubbles. Helps with vacuum degassing silicone. Makes removing air bubbles in molds easy! Get super smooth molds. Vacuum casting is a pro technique .
- Pressure Pot for Mold Casting: Pushes silicone into tiny details.
- Rotocasting Machine: For making hollow things using rotocasting with silicone molds.
- Silicone Mat: A non-stick work surface. Great for cleanup.
- Silicone Thinner: Makes silicone flow better for very detailed molds.
- Bubble Buster: A tool to help pop bubbles.
- Old Brush: For brush-on silicone molds.
You can buy supplies at craft stores like Michaels, art stores like The Compleat Sculptor or The Clayground, plastic shops like TAP Plastics, or online from Amazon, Freeman Supply, or Pacific Molds.

Let’s Make a Mold! Step-by-Step Guide
Okay, are you ready? Let’s follow this silicone mold making tutorial.
Step 1: Get Your Shape Ready (Master Model)
- Clean it up: Your item must be super clean and dry. No dust! No oil! This helps with silicone mold surface cleaning.
- Seal it (if needed): Porous things like wood might need sealant first.
- Position it: Place your item on a flat surface. A silicone mat is good.
Step 2: Build the Walls (Mold Box)
- Build a box around your item. Leave a little space (like half an inch) all around.
- Make sure the walls are taller than your item.
- Glue the edges: Use a hot glue gun. No leaks allowed 5! This is part of silicone mold frame construction.
Step 3: Mix the Magic Silicone!
- Read the label! Every silicone is a bit different.
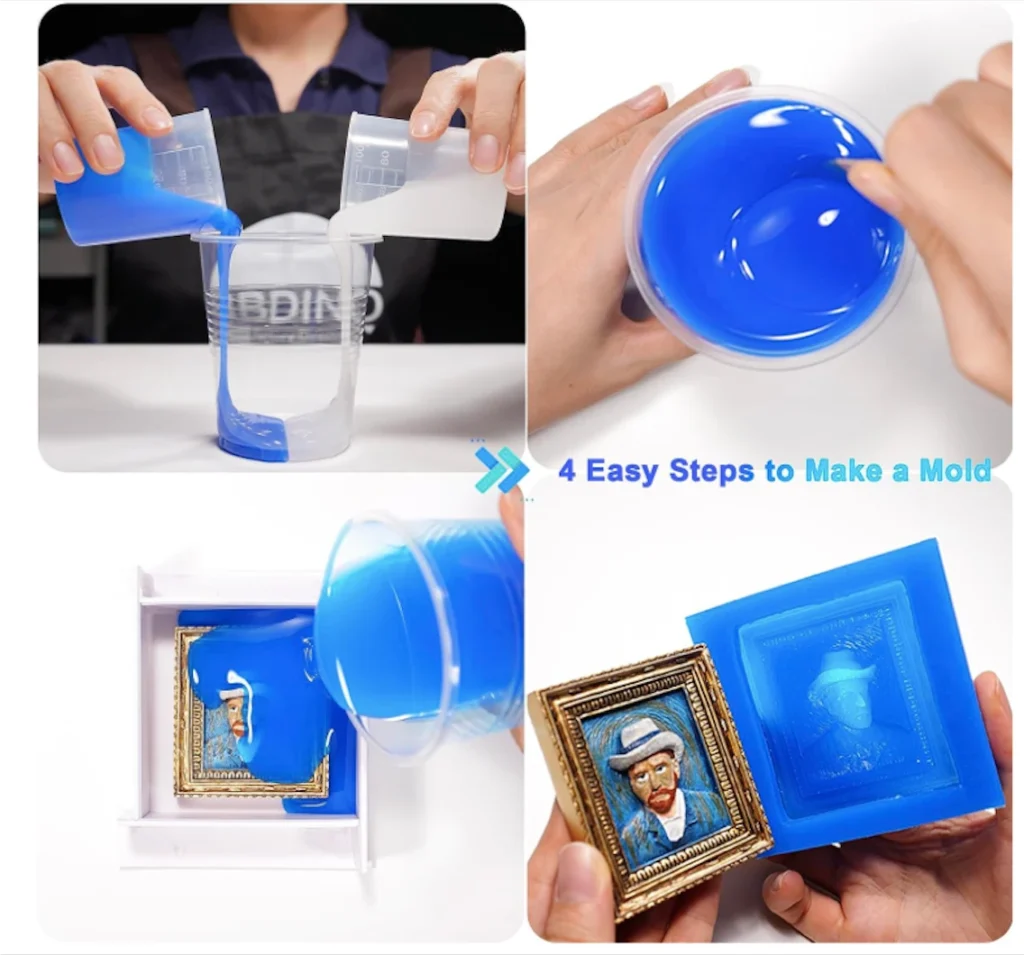
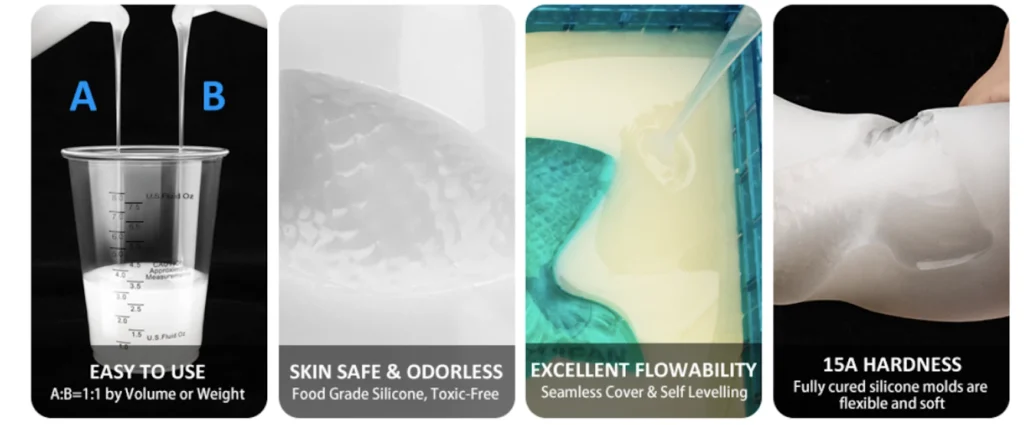
- Usually, you mix Part A and Part B. Often it is a 1 to 1 mix 5. Use your scale!
- Pour Part A into a cup. Pour Part B into the same cup.
- Stir well: Use a clean stick. Scrape the sides and bottom. Mix until the color is 100% UNIFORM 5. No streaks! Do it slowly to avoid too many bubbles.
Step 4: Pour it In!
- Optional: Use Mold Release: Spray a thin coat inside the box and on your item. Let it dry.
- Pour slowly: Pour the mixed silicone into the box. Pour into a corner, not right onto your item. Let the silicone flow over it. This helps prevent bubbles. This is how you make pour-on silicone molds.
- Fill until the silicone covers the top of your item by about half an inch. Silicone mold thickness guidelines suggest this for strength.
Step 5: Wait for the Magic (Curing)
- Patience!: Let the silicone sit still. The silicone rubber curing process takes time. Usually 6 to 24 hours. Check the instructions. Fast-cure silicone options exist if you are in a hurry. Some silicone molds can be made within a day 6.
- Keep it Level: Don’t move it while it cures. An Adjustable Resin Leveling Table can help keep things flat.
- Pop Bubbles: If you see big bubbles on top, you can gently blow on them or use a pin. A Bubble Buster tool can help.
Step 6: Open Your Surprise! (Demolding)
- Once cured, carefully take the walls away.
- Gently pull the silicone mold off your item. Be careful! Demolding silicone without tearing needs care, especially around silicone mold undercuts (tricky bits that stick out).
- Your reusable silicone molds are ready!

Super Tips for Awesome Molds! (Pro Techniques)
Want to make even better molds? Try these tricks!
- Beat the Bubbles:
- A vacuum chamber is the best way for removing air bubbles in molds. It pulls all the air out before you pour. Vacuum casting gives perfect results 6.
- A pressure pot squishes bubbles tiny.
- Tricky Shapes:
- For very detailed things like jewelry, try transparent silicone. You can see bubbles inside 3!
- Use brush-on silicone molds for big or weird shapes. You paint layers of silicone on. Use thicker silicone or add a silicone mold support shell (like plaster bandages) so it holds its shape.
- Learn about mold venting techniques to let air escape.
- Use silicone mold registration keys (little bumps and holes) for two-part molds so they line up perfectly.
- Choose the Right Feel: Silicone mold Shore hardness tells you how hard or soft the silicone is. Softer silicone (like Shore A 20) is stretchy for flexible silicone molds. Harder silicone is better for firm molds.
- Make it Last: Good silicone mold durability tips include cleaning after use and storing flat. Know the silicone mold life expectancy. With care, platinum molds can last many uses. You can even learn how to fix torn silicone molds. Silicone mold storage tips help too!
- Color Fun: You can add silicone coloring pigments like Smooth-Cast Colorants to tint your molds.
- Advanced Materials: Explore hybrid silicone-polyurethane molds or high-temperature silicone molds for special jobs.
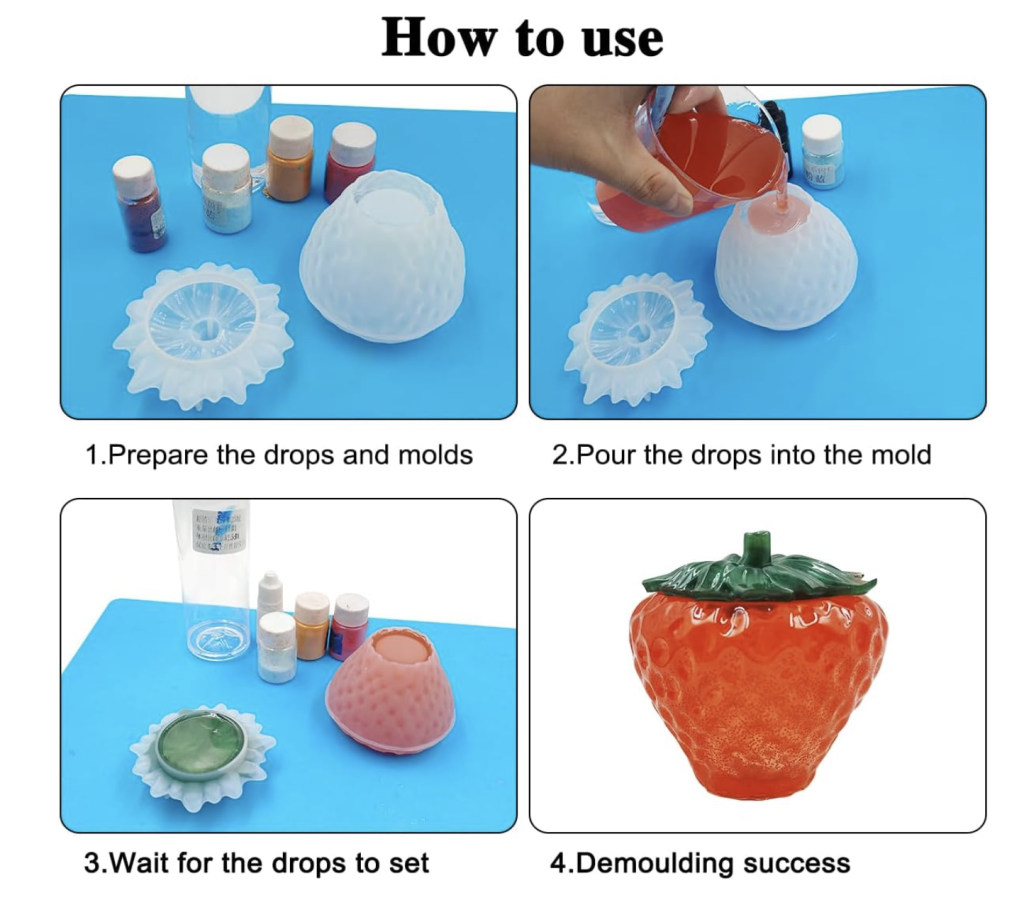
- Making Things Inside: Use your mold for ArtResin epoxy, concrete, plaster, soap, or even silicone for climbing holds molding. Maybe try rotocasting with silicone molds for hollow parts. Check out guides like Silicone for resin mold making. For advanced uses, look into Silicone for Rapid Protyping Casting.
Watch Out! Common Mistakes
Making molds is easy, but watch out for these boo-boos:
- Sticky Mess: Forgetting mold release spray. Oops! The mold might stick or tear.
- Gooey Spots: Not mixing A and B parts enough. Mix, mix, mix until the color is totally even 5!
- Bubble Trouble: Pouring too fast or not degassing. Pour slow and low!
- Wobbly Molds: Making the walls too thin. Follow silicone mold thickness guidelines.
- Warped Molds: Not letting it cure fully on a flat spot.
- Wrong Silicone: Using tin-cure for food molds. Always use food-grade silicone molds or platinum-cure silicone for anything that touches food or skin. Use non-toxic silicone solutions.
Quick Mold Ideas (Fast & Easy!)
Need a mold super fast?
- Silicone Caulk + Soap Water: Mix 100% construction silicone with soapy water (10 parts water, 1 part soap) 7. Knead it like dough with gloves on for 5 minutes 7. Press your item in. Good for small, simple things. This is one of the 3 Easy Silicone Mold Making Methods 8.
- Silicone Putty: This is like play-dough. Mix two parts by hand. Press your item in. It cures fast, sometimes in 30 minutes 9! Great for beginners 10. No fancy tools needed 9.
Here is a table comparing methods:
| Method | Materials | Time | Pro Tip | Source |
| Caulk + Soap Water | Construction Silicone, Soap | ~10 mins | Knead well in water until not sticky | 7 |
| Two-Part Putty | Silicone Putty | ~30 mins | Press item firmly for clear impression | 9 |
| Two-Part Liquid Pour | Liquid Silicone, Mold Box | 6-24 hrs | Mix 1:1 ratio until color is uniform | 5 |
| Vacuum Casting Assist | Liquid Silicone, Vacuum | ~24 hrs | Removes nearly all bubbles | 6 |
Questions People Ask (FAQs)
Q: Can I reuse my silicone molds?
A: Yes! That's why they are great. Reusable silicone molds made from good platinum-cure silicone can last for 50+ uses if you are careful. Tin-cure silicone molds might wear out faster 2. Silicone mold life expectancy depends on care.
Q: How do I stop bubbles?
A: Pour slowly. Mix gently. Best way? Use a vacuum chamber for vacuum degassing silicone . Or use a pressure pot for mold casting.
Q: My mold ripped! Can I fix it?
A: Sometimes. You can try fixing torn silicone molds with special silicone glue or fresh silicone, but it's tricky. Demolding silicone without tearing is easier if you use mold release.
Q: Is it safe?
A: Follow mold-making safety precautions. Wear nitrile gloves. Work in a room with fresh air or wear a ventilation mask. Use food-grade silicone molds for food. Many silicones are non-toxic silicone solutions when cured.
Q: What about tricky shapes with undercuts?
A: Use stretchy, flexible silicone molds (lower Shore hardness). Or make a two-part mold with silicone mold registration keys. This is where silicone mold undercuts knowledge helps.
Q: What if my silicone mold shrinks?
A: All silicone has some silicone mold shrinkage. Platinum-cure usually shrinks less than tin-cure 3. Choose low-shrinkage silicone for precise jobs.
You Can Do It! Make Amazing Molds!
Now you know how to make silicone molds! Start with simple shapes if you are a beginner 4. You don’t need fancy stuff to start 9. Try the silicone caulk molds method or putty first.
As you get better, try two-part silicone molds with pour-on silicone molds techniques. Maybe get a vacuum chamber for super smooth results using vacuum casting 6. Make molds for anything – silicone mold for concrete casting, silicone mold for 3D prints, silicone mold for pottery, even silicone cake molds!
Explore different brands like Smooth-On, Alumilite, Polytek, or Dow Corning. Learn from pros on YouTube like Crafsman, Robert Tolone, Brick in the Yard, or Zack Freedman. Read guides on Instructables or in Make: Magazine or EpoxyWorks. Look at projects from Hirst Arts for ideas. Join the Cosplay community – they make amazing props with molds!
Making molds is a cool skill. You can copy things, make gifts, or start a small business. Have fun making your own unique creations! Remember the foolproof method to make your own silicone molds involves careful mixing and pouring 11. Happy molding!