
How to Repair a Torn Silicone Mold and Save Your Project
A tear can ruin your mood fast.
You’ve poured your material, waited patiently, and right when you’re about to demold, you notice a rip or hole staring back at you. Most people think that’s the end and toss the mold straight into the bin. But you don’t have to.
With the right tools and methods, you can master how to repair silicone mold damage and keep your projects moving without losing time or money.
How to Repair a Torn Silicone Mold and Save Your Project 1
Can All Silicone Molds Be Repaired? 1
The Best Adhesive for Repairing Silicone Molds 2
Step-by-Step: Repairing a Small Tear 2
Patching a Larger Hole in a Silicone Mold 3
How to Reinforce the Repaired Area 3
Tips for Preventing Tears in Silicone Molds 3
When It’s Better to Replace Than Repair 4
Can All Silicone Molds Be Repaired?
The short answer is no.
Some molds can be saved. Others are simply too far gone.
It depends on the type of silicone you used and where the damage is located. Platinum-cure silicone usually bonds much better with adhesives. Tin-cure silicone often resists repair.
Size matters too. A small slit on the side? That’s easy. A big rip running through a detailed cavity? You’ll struggle to get clean castings even after patching.
Many makers estimate that 90% of small tears are repairable if you use proper methods. That’s why knowing how to repair silicone mold issues is such a valuable skill. You keep molds alive longer and avoid wasted material.
Storing molds correctly prevents many problems before they start. Check our guide on How to Clean and Store Your Silicone Molds.
The Best Adhesive for Repairing Silicone Molds
Let’s make one thing clear. Normal glue will not work.
Silicone rubber is resistant by nature. That’s why it’s great for molds. But it’s also why patching requires a silicone-based adhesive. It chemically bonds with silicone surfaces instead of sitting on top like superglue.
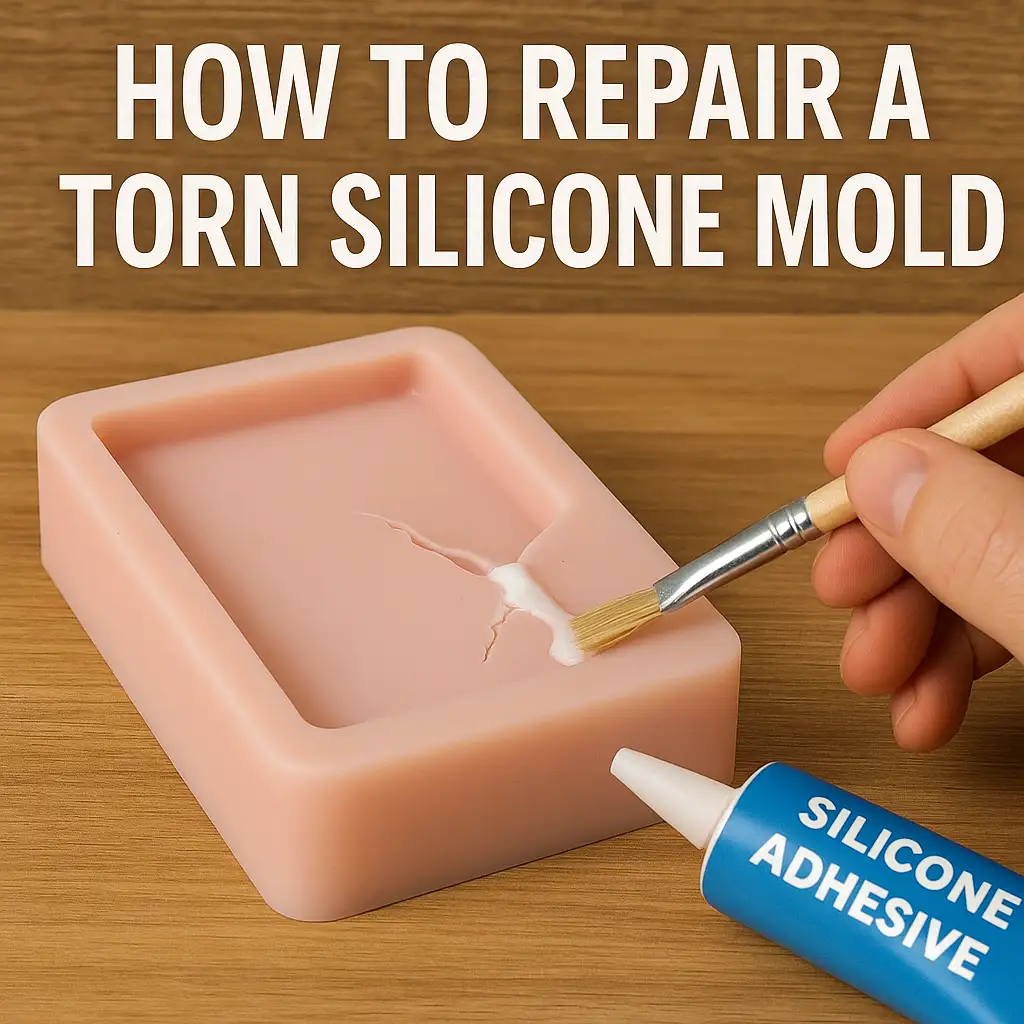
Alternative Text: A realistic photo showing a torn silicone mold being repaired with silicone adhesive applied by a brush, demonstrating how to repair silicone mold damage.
Here’s what makes it effective.
- Viscosity: The adhesive has a range between five hundred and two thousand millipascal-seconds. This is thick enough to stay put on a tear, but fluid enough to flow into the crack. If viscosity is too low, it runs everywhere and makes a mess. If it’s too high, it clumps and doesn’t penetrate the damage. This balance is what makes repairs last.
- Cure time: Sil-Poxy® feels tack-free in about half an hour, but that doesn’t mean it’s ready. Full cure happens after twenty-four hours at room temperature. If you rush and use the mold too soon, you risk reopening the tear. Waiting a full day ensures the repair becomes part of the mold’s structure.
- Hardness: Most adhesives have a Shore A hardness of about 40. That means they are flexible but not floppy. If the adhesive were softer, it would stretch and fail. If it were harder, it would crack instead of bending with the mold. This balance matches the flexibility of most casting silicones.
Step-by-Step: Repairing a Small Tear
Small tears happen often.
One wrong tug during demolding. One sharp edge on your casting. And suddenly you see a slit in the silicone.
The good news is that fixing it is simple. Start by cleaning the surface. Use mild soap and water, rinse it well, then dry completely. Wipe it with isopropyl alcohol for extra security. Adhesive only sticks if the surface is free of oils and dust.
Now apply the adhesive. Squeeze a thin bead directly into the tear. Spread it evenly with a toothpick or brush. Don’t overload it. Too much adhesive leaves bumps. Too little doesn’t hold.
Next, align the edges. Press them together carefully. Tape or a small clamp can help if the mold is larger. Once aligned, stop touching it. The adhesive needs time.
Leave it for twenty-four hours. Even if it feels dry sooner, don’t risk it. After curing, test with a small casting. If it holds without leaks, you’ve just mastered the basics of how to repair silicone mold damage.
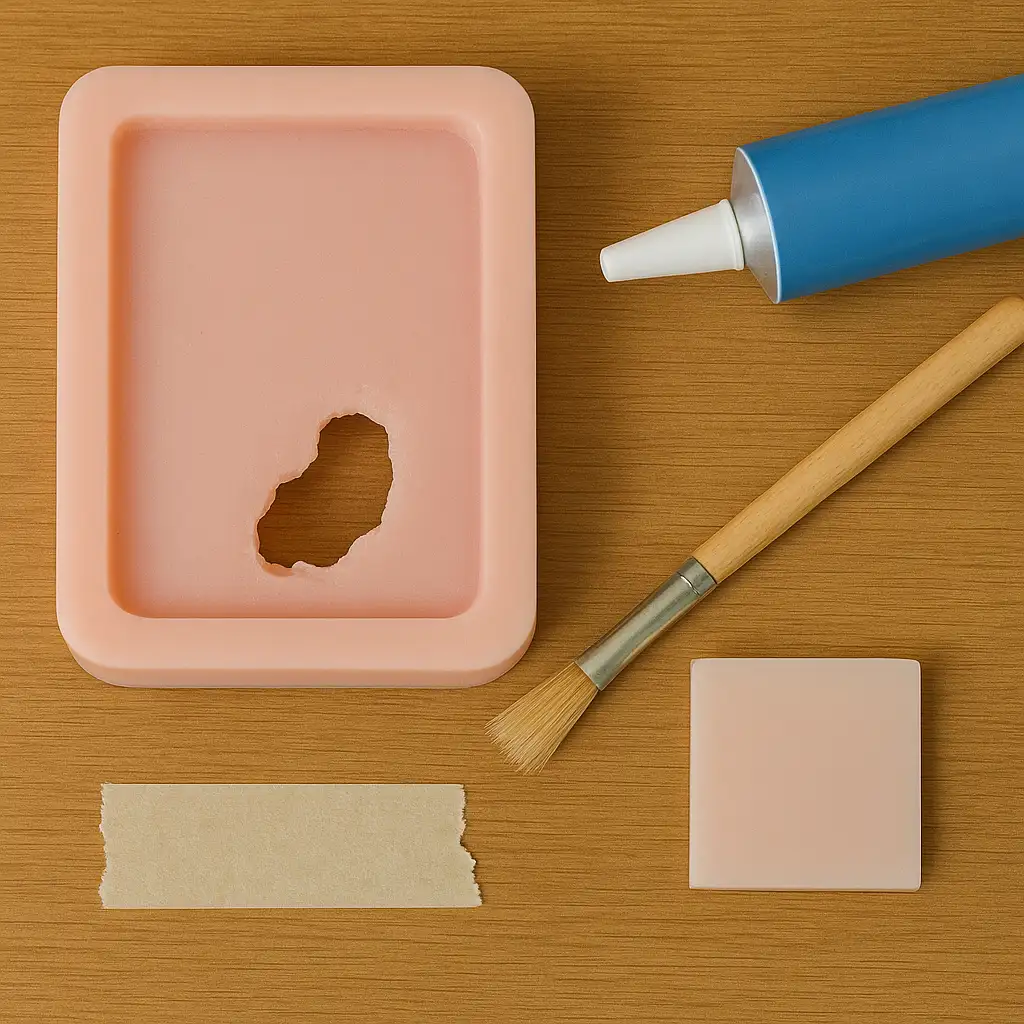
Alt Text: A photo showing tools for repairing a silicone mold, including a torn silicone mold, silicone adhesive tube, paintbrush, tape, and a silicone patch arranged neatly on a wooden surface.
Patching a Larger Hole in a Silicone Mold
Now for the tougher scenario. A hole.
At first glance, it looks hopeless. But with patience, you can make it work.
Trim the ragged edges of the hole so the surface is smooth. Prepare a patch of thin silicone, ideally a scrap from another mold. Using a similar silicone type improves compatibility.
Apply adhesive around the hole and on the patch. Press the patch over the gap and smooth out any bubbles. Keep it steady with tape or a light clamp. Leave it for at least twenty-four hours.
When you check the repair, it may not look pretty. That doesn’t matter. What matters is function. If it holds liquid without leaking, the mold still has life left. For expensive or large molds, this trick saves real money.
For best results, use Sil-Poxy® adhesive when patching large holes. It’s the standard for anyone learning how to repair silicone mold damage beyond small tears.
How to Reinforce the Repaired Area
A repaired tear is always a weak point. Reinforcement makes it stronger.
One method is adding a feathered layer of adhesive around the tear. Spread it thin, extending past the damaged spot. This spreads the stress so the tear doesn’t reopen.
Another method is embedding fabric into the adhesive before it cures. Open-weave reinforcement mesh works well. It creates a flexible backbone that holds the silicone together.
Reinforcement is especially useful if you cast heavy materials like concrete or large resin pours. Without it, you’ll be back repairing the same spot soon.
With it, you can keep using your mold without worry. That’s why professionals insist on reinforcement when they explain how to repair silicone mold issues for long-term use.
Tips for Preventing Tears in Silicone Molds
Repairing is good. Preventing is better.
Choose the right hardness for your molds. Soft silicone captures tiny details but tears more easily. Harder silicone lasts longer but sacrifices some flexibility. Balance your choice based on the project.
Demolding is another critical step. Don’t yank the casting out. Flex the mold gently. Peel it away slowly instead of pulling. That small change prevents a lot of stress and damage.
Even your master model plays a role. Sharp corners or rough edges put strain on the mold. Sand them smoother before pouring silicone. A little prep saves hours of repair later.
Cleaning also matters. Avoid abrasive pads and harsh tools. Stick with mild soap and soft sponges. Rough cleaning scratches and weakens silicone over time.
Storage is the final key. Keep molds flat or supported. Don’t let them fold. Don’t stack heavy items on top. Heat and sunlight degrade silicone, so store them in cool, dry spaces.
With these habits, you’ll spend less time learning how to repair silicone mold damage and more time casting.
When It’s Better to Replace Than Repair
Sometimes the best repair is no repair at all.
If your mold has multiple tears, warped walls, or degraded silicone that feels sticky, it’s time to replace. You can patch forever, but the results will get worse.
Knowing how to repair silicone mold is valuable, but knowing when to quit is even more valuable. Replacement saves frustration and guarantees clean castings.
Check mold-making silicones at Topsil Silicone if you’re ready to start fresh.
A torn mold isn’t failure; it’s your chance to prove you know how to repair silicone mold and keep creating.