

Silicone molds are widely used in resin casting, concrete decoration, soap making, candle production, prototyping, and many other applications. But making a high-quality silicone mold is not just about pouring rubber over an object and waiting for it to cure.
The final result depends on choosing the right silicone, preparing the master correctly, controlling bubbles, and using the proper mold design for the shape you want to reproduce.
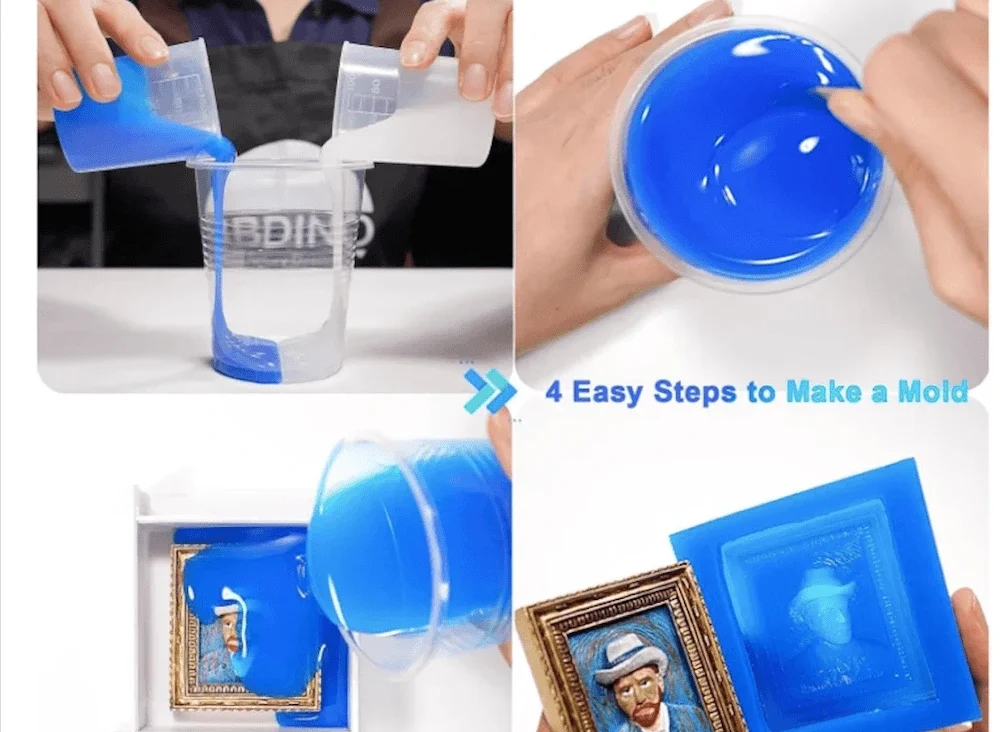
In this guide, we will explain how to make silicone molds step by step, what materials you need, and how to choose the right silicone.
What is a silicone mold?
A silicone mold is a flexible mold made from liquid silicone rubber that cures into an elastic, durable material. It is used to capture the shape and surface details of an original object, also called a master model, so that the shape can be reproduced multiple times.
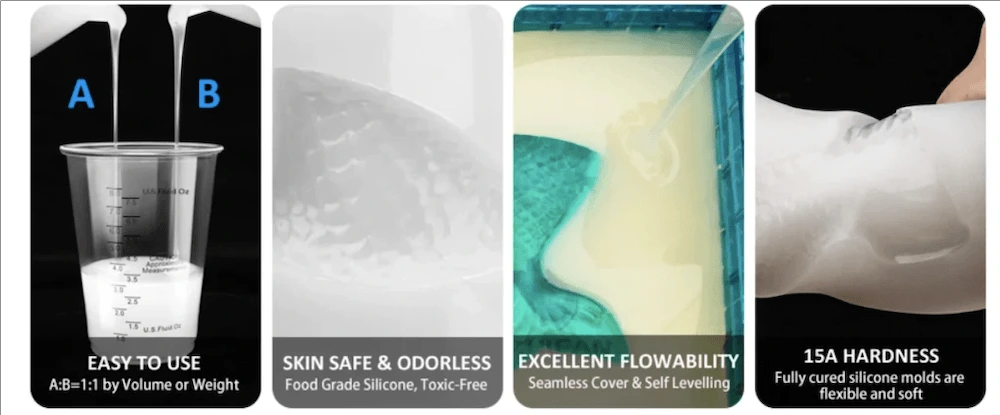
Many people choose silicone molds because they offer a strong balance of detail reproduction, flexibility, tear resistance, and ease of demolding. Silicone molds can be used to cast a wide range of materials, including resin, wax, plaster, concrete, soap, and, in some cases, food-contact materials such as chocolate, depending on the silicone grade used.
What Materials Do You Need?
To make a silicone mold, you need more than just silicone rubber. A typical setup also includes a master model, a mold box, mixing containers, stir sticks, and a digital scale for accurate measurement.
Depending on the project complexity, you may also need a release agent, clay for parting lines, and a vacuum chamber to reduce trapped air bubbles.
How to Choose the Right Silicone for Mold Making?
Choosing the right silicone affects detail reproduction, demolding, mold life, and casting results. The main factors to consider are the curing system, hardness, viscosity, pot life, and tear strength.
Tin-Cure vs Platinum-Cure Silicone
Tin-cure silicone is usually more affordable and works well for general mold-making projects. It is often used for simple molds and cost-sensitive applications.
Силикон платинового отверждения is usually preferred when lower shrinkage, better detail reproduction, cleaner curing, and longer mold life are required. It is often the better choice for high-precision molds and repeated casting.
How Hardness Affects Mold Performance
Softer silicone is easier to demold and works better for shapes with undercuts or fine details. Harder silicone provides better support and dimensional stability, but it can make demolding more difficult if the shape is complex.
Why Viscosity, Pot Life, and Tear Strength Matter
Lower-viscosity silicone flows more easily into fine details and helps reduce trapped air. Pot life determines how much working time you have after mixing, which is important for larger or more detailed molds.
Tear strength matters during demolding. A silicone with higher tear strength is less likely to rip around thin edges, deep undercuts, or delicate details.
How to Make Silicone Molds Step by Step
The mold-making process is straightforward, but each step affects detail reproduction, mold strength, and ease of demolding.
Step 1: Prepare the Master Model

Start by cleaning the master model thoroughly. Dust, oil, moisture, or surface residue can affect detail capture and may even interfere with curing in some cases.
Step 2: Build the Mold Box
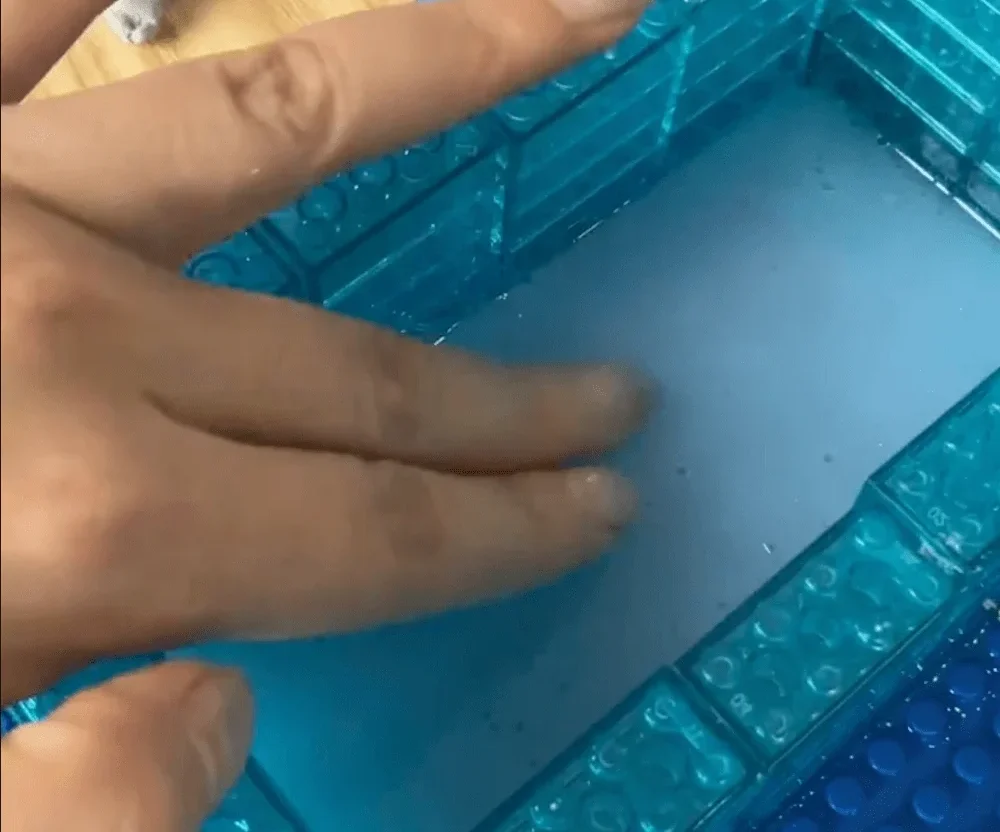
Place the master model inside a mold box that gives enough space around all sides of the object. In most cases, you should leave enough silicone thickness around the model to give the mold proper strength and tear resistance after curing.
Step 3: Measure and Mix the Silicone

Measure Part A and Part B according to the manufacturer’s recommended ratio. Incorrect ratios can lead to poor curing, weak mold strength, sticky surfaces, or reduced mold life.
Mix the silicone slowly but thoroughly, making sure the material is fully combined without leaving unmixed streaks on the sides or bottom of the container.
Step 4: Remove Air Bubbles if Needed
If the silicone or the mold design is likely to trap air, degassing can improve the final result. This is especially useful for detailed masters, deep molds, or low-viscosity silicones where bubbles may affect the surface finish.
Step 5: Pour the Silicone Slowly
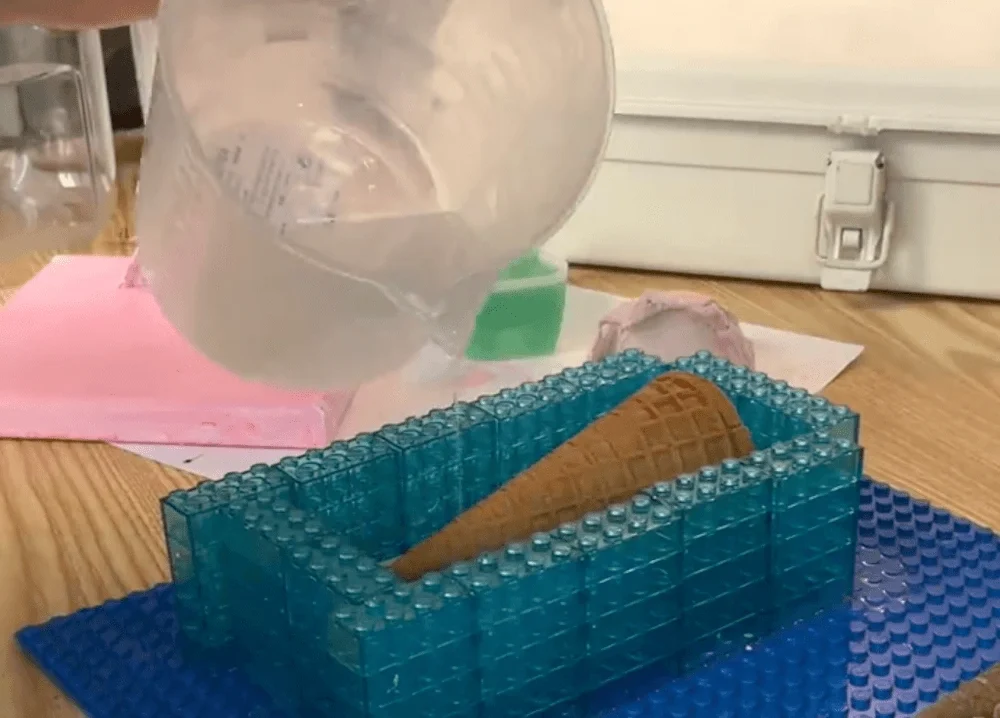
Pour the silicone in a thin, steady stream from one side of the mold box rather than directly over the highest-detail area. This allows the silicone to flow gradually around the master and helps push out trapped air as the mold fills.
Step 6: Let the Mold Cure Fully
Once the silicone has been poured, leave it undisturbed until it has fully cured. The exact curing time depends on the silicone type, room temperature, humidity, and mold size.
Step 7: Remove the Mold and Trim the Edges
After full cure, remove the mold box carefully and separate the silicone mold from the master. Take your time during demolding, especially if the object has thin areas, undercuts, or delicate details that may place stress on the mold. Learn how to avoid mistakes in this article.
One-Piece vs Two-Part Silicone Molds
Simple objects usually work with a one-piece mold, while more complex shapes often require a two-part mold.
When to Use a One-Piece Mold
A one-piece mold is best for simple shapes that can be removed in one direction. It is easier to make and works well for projects with few undercuts and uncomplicated geometry.
This type of mold is commonly used for basic resin pieces, soap molds, candles, and simple decorative parts.
When to Use a Two-Part Mold
A two-part mold is better for shapes with undercuts, irregular geometry, or details on multiple sides. It allows the mold to open in two sections, which makes demolding easier and reduces stress on the silicone.
It is often used for detailed sculptures, technical parts, and other shapes that cannot be released cleanly from a one-piece mold. For a more detailed walkthrough, see our guide on How to Make a Two-Part Silicone Mold.
ЧАСТО ЗАДАВАЕМЫЕ ВОПРОСЫ
Can I make a silicone mold without a vacuum chamber?
Yes. Many simple silicone molds can be made without a vacuum chamber if the silicone is mixed carefully and poured slowly in a thin stream. However, vacuum degassing can improve results for highly detailed molds or larger pours.
Should I use platinum-cure or tin-cure silicone?
Use tin-cure silicone for basic mold-making when cost is a priority. Use platinum-cure silicone when you need cleaner curing, lower shrinkage, better precision, or longer-lasting molds.
How thick should a silicone mold be?
In most cases, the silicone should be thick enough to support the shape without tearing during demolding. Very thin mold walls can fail more easily, while thicker walls usually provide better strength and stability.
How do I avoid bubbles in silicone molds?
To reduce bubbles, mix the silicone carefully, pour it slowly from one side in a thin stream, and degas it if needed. Good mold box design and proper silicone viscosity also help improve bubble control.
How long does a silicone mold last?
Mold life depends on the silicone type, mold design, casting material, and how the mold is used. A well-made mold used under proper conditions can last through many casting cycles, while poor demolding or harsh materials will shorten its service life.