
Key Takeaways
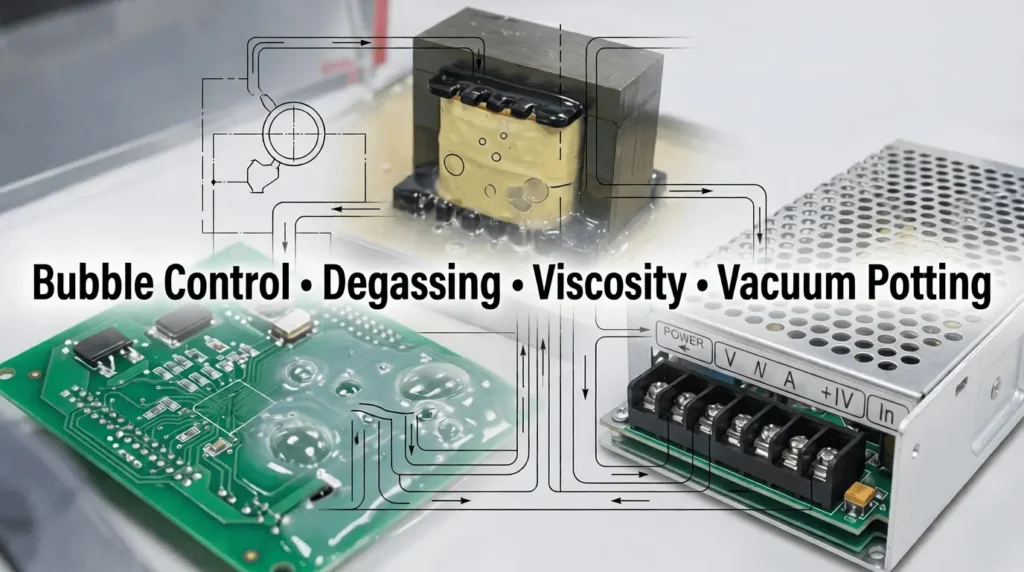
Bubbles and voids in silicone potting compound are not only appearance defects. Bubbles are trapped air pockets, while voids are unfilled spaces inside the potted structure. Both can reduce heat transfer, weaken moisture protection and increase electrical insulation failure risk.
Most bubble problems come from four root causes: mismatched material viscosity, improper mixing or pouring method, complex component geometry, or air introduced by dispensing equipment.
Vacuum degassing alone is not always enough. Vacuum degassing removes air from the mixed silicone, but it may not remove air trapped under transformers, inside coils, in deep cavities or around dense components.
For complex assemblies, vacuum potting may be required. Transformers, coils, sensors, connectors and deep potting structures often need the process to remove air from both the silicone and the product structure.
Rule of thumb: identify when and where bubbles appear before changing material, vacuum settings or production parameters. Surface bubbles, internal voids, bubbles after curing and bubbles only in automatic dispensing usually point to different root causes.
Start Here: Identify the Bubble Pattern First
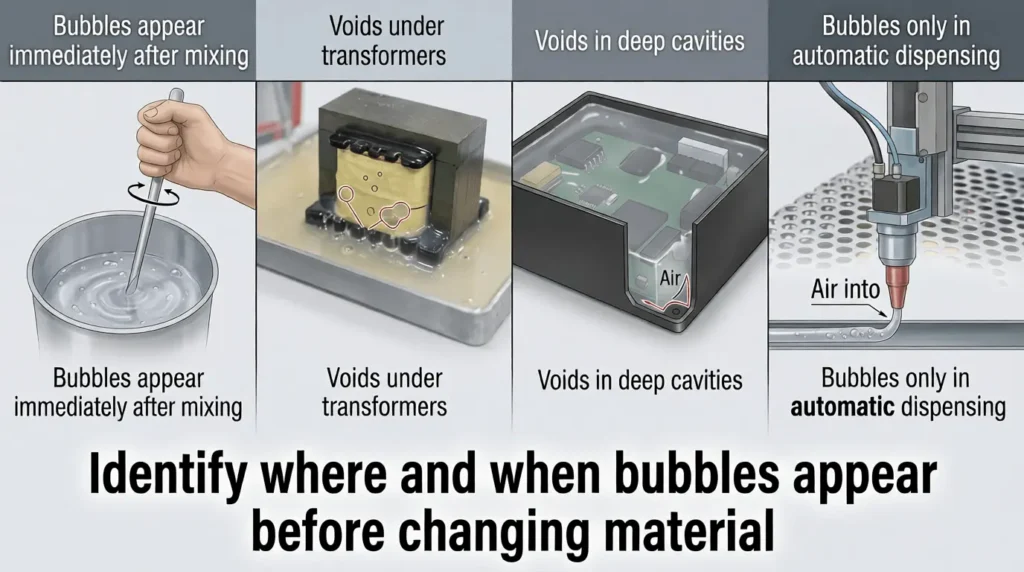
Before changing material or adjusting vacuum parameters, identify the bubble pattern. This is the fastest way to narrow down the root cause.
| Bubble Pattern | Most Likely Direction | First Action |
| Bubbles appear immediately after mixing | Mixing method / material degassing | Slow mixing and run a vacuum degassing trial |
| Surface bubbles only | Pouring method / surface release | Reduce pouring height and allow rest time |
| Voids under transformers | Component geometry / viscosity | Adjust filling path and consider vacuum potting |
| Bubbles around capacitors | Air blocked at component base | Check flowability, nozzle position and filling direction |
| Bubbles inside coil or winding gaps | Narrow structure / air trapping | Use suitable viscosity and test vacuum potting |
| Voids in deep cavities | Potting depth / air escape path | Use staged filling or vacuum potting |
| Bubbles only in thermally conductive silicone | High filler loading / high viscosity | Check lower-viscosity thermal grade or process adjustment |
| Bubbles only in automatic dispensing | Equipment / static mixer / refill process | Check pump line, hose, mixer and A/B metering |
| Bubbles appear after curing | Moisture, contamination or cure issue | Check substrate dryness and curing condition |
Bubble problems are often caused by a combination of material, structure and process. This table should be used as the first troubleshooting step, not as a final diagnosis.
Why Bubbles and Voids Are More Than Appearance Defects
Voids and delamination in potting applications may provide pathways for moisture or contaminants and may affect insulation or thermal performance.
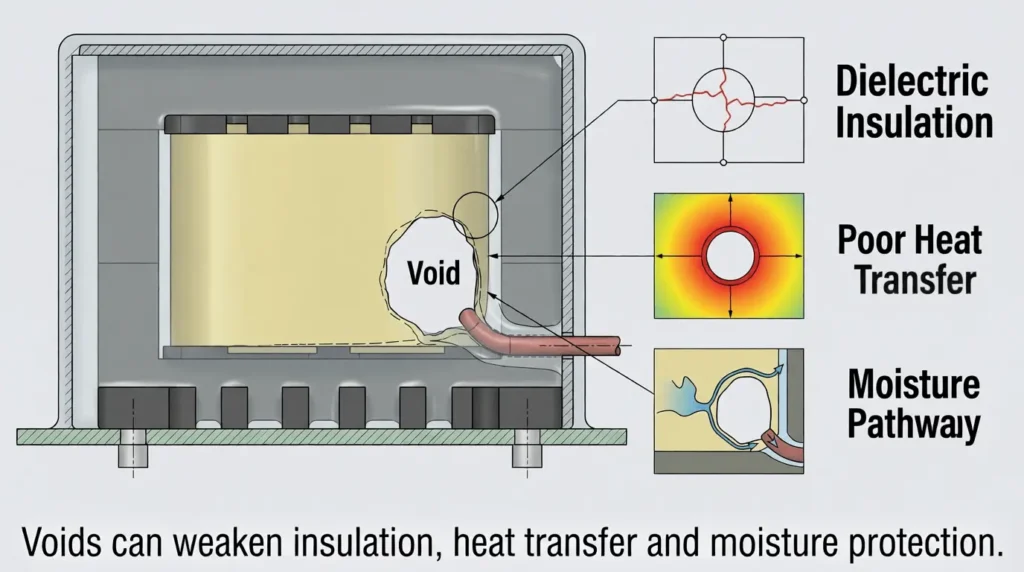
In silicone potting applications, bubbles and voids may look small, but they can create serious reliability risks.
They may lead to:
- dielectric test failure
- poor heat transfer
- moisture pathways
- weak protection around components
- local adhesion problems
- transformer or coil weak points
- temperature rise higher than expected
- failure after humidity aging
- failure after thermal cycling
- higher rework or scrap rate
- unstable mass production yield
For example, a void under a transformer may interrupt the thermal path between the heat source and the housing. A bubble around a wire outlet may become a moisture-risk point. A void inside a coil gap may reduce insulation reliability after aging.
This is why bubble control should be tested in the real product structure, not only by surface appearance.
If you are new to electronic encapsulation, you can first learn what silicone potting compound is and how it works.
Bubbles vs Voids vs Foam vs Delamination
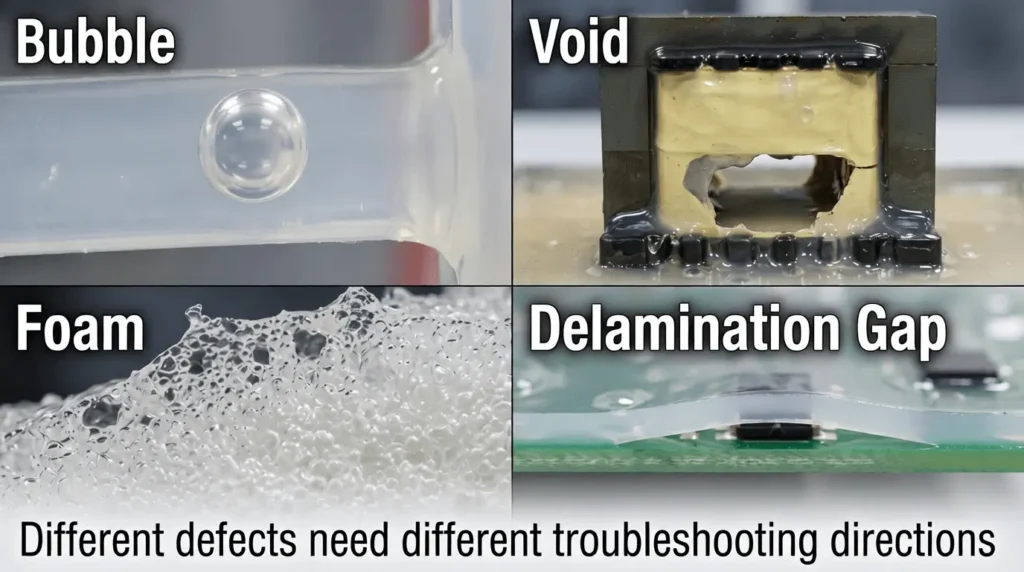
Many users describe all air-related defects as “bubbles,” but different defects may have different causes.
| Defect Type | Meaning | Typical Location | Main Concern |
| Bubble | Air trapped inside or on the surface of mixed silicone | Surface, near components, inside thick potting | Appearance, insulation, heat transfer |
| Void | Empty space left unfilled by potting compound | Under transformers, coil gaps, housing corners, deep cavities | Weak protection and poor filling |
| Foam | Many small bubbles throughout the material | After aggressive mixing or poor degassing | Process instability |
| Delamination gap | Separation between cured silicone and substrate | PCB surface, housing wall, component surface | Adhesion and aging reliability |
Surface bubbles may come from mixing or pouring. Internal voids may come from product geometry, high viscosity or wrong filling direction. Delamination gaps may involve surface contamination, poor adhesion or thermal cycling.
4 Root Cause Groups: Material, Process, Structure and Equipment
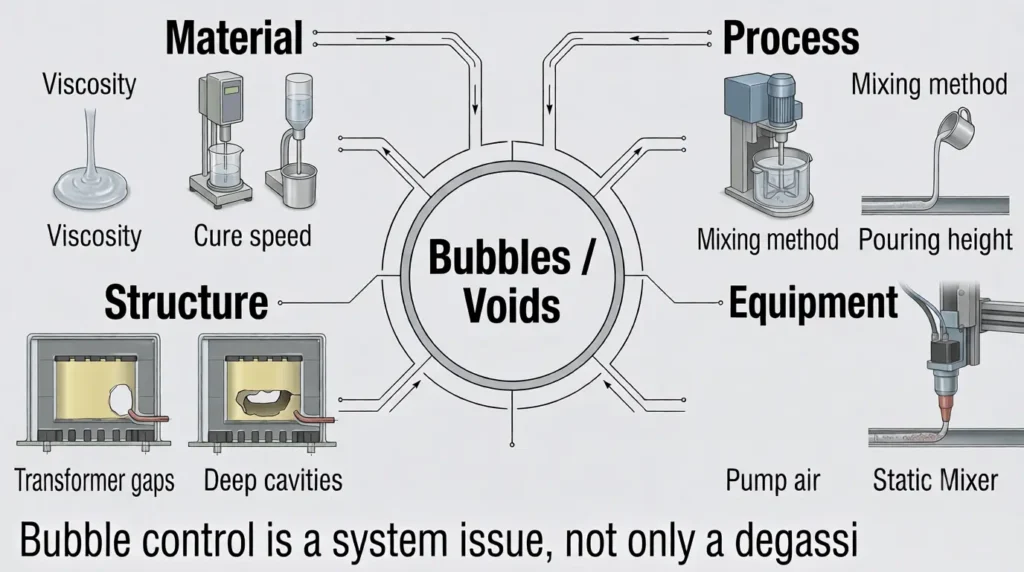
Bubbles and voids are easier to solve when they are grouped by root cause. In real production, more than one group may be involved.
1.1 Material-Related Causes
Material properties strongly affect bubble release and filling performance.
Common material-related causes include:
- viscosity too high
- pot life too short
- cure speed too fast
- high filler loading
- thermally conductive silicone with poor flow
- poor air release behavior
- material temperature too low before use
High viscosity makes bubbles rise slowly. Short pot life gives bubbles less time to escape. Thermally conductive silicone often contains more fillers, which may increase viscosity and make air release more difficult.
| Material Situation | Bubble Risk | Selection Direction |
| Very low viscosity | Easier filling, but may leak or flow too much | Good for narrow gaps if leakage is controlled |
| Medium viscosity | Balanced flow and control | Suitable for many electronic potting applications |
| High viscosity | Higher risk of trapped air | May need vacuum potting or process adjustment |
| Thermally filled silicone | Bubbles can be harder to release | Balance thermal conductivity with flowability |
| Short pot life | Bubbles may be locked before escape | Use longer pot life or improve process speed |
| Low material temperature | Higher viscosity during use | Condition material before production if needed |
Selection tip: The best viscosity is not always the lowest number on the TDS. It is the viscosity that matches the potting depth, component layout, leakage control and production speed.
1.2 Process-Related Causes
Even a suitable silicone can create bubbles if the process is not controlled well.
Common process-related causes include:
- mixing too fast
- aggressive hand stirring
- using a narrow or deep mixing cup
- pouring from too high
- pouring too fast
- wrong filling direction
- insufficient degassing
- vacuum applied too late
- potting after the material becomes too thick
- curing too quickly before bubbles escape
If bubbles appear immediately after mixing, the first problem to check is usually mixing method. If bubbles appear during filling, the pouring point, filling speed and air escape path should be checked.
Process tip: The goal is not only to remove air from the silicone. The goal is to let the silicone fill the product while pushing trapped air out.
1.3 Structure-Related Causes
Vacuum potting is often considered for challenging geometries such as undercuts or tight gaps.
Some products naturally trap air because of their geometry.
Common high-risk structures include:
- transformers
- coils
- winding gaps
- capacitor bases
- tall components
- wire outlets
- connector cavities
- housing corners
- deep cavities
- narrow PCB gaps
- heat sink contact areas
For example, a transformer may look fully covered from the surface, but air may remain underneath the body or inside winding gaps. A capacitor base may block material flow and leave a void at the bottom. A deep housing may trap air at the lower corner if the filling direction is not designed well.
Design tip: If bubbles always appear in the same location, the issue is often related to product structure or filling path, not only material quality.
1.4 Equipment-Related Causes
In automatic dispensing, bubbles may come from the equipment rather than the silicone itself.
Common equipment-related causes include:
- air in the pump line
- air introduced during material refill
- unsuitable static mixer
- unstable A/B metering
- dispensing pressure too high
- hose leakage
- nozzle position problem
- poor equipment maintenance
- material not conditioned before use
If hand-mixed samples are acceptable but machine-dispensed parts show bubbles, the dispensing system should be checked carefully.
Production tip: Automatic dispensing requires stable viscosity, suitable pot life and good equipment matching. A material that works in manual testing may still need process adjustment for mass production.
Vacuum Degassing vs Vacuum Potting
For a complete electronics potting workflow, see our guide on how to pot electronics with silicone.
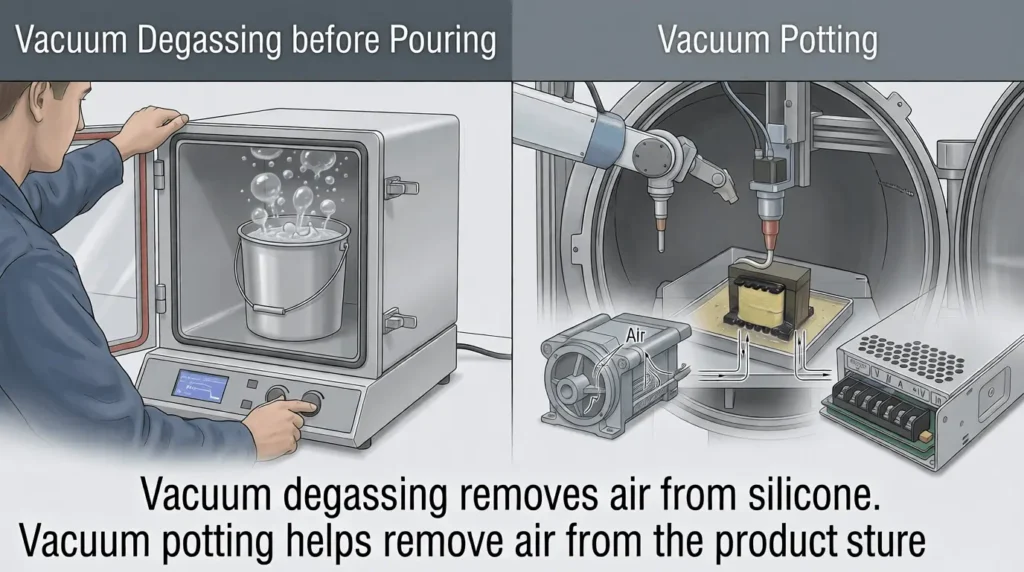
Vacuum degassing and vacuum potting are not the same.
Vacuum degassing removes air from the mixed silicone. Vacuum potting helps remove air from both the silicone and the product structure.
If the air is only inside the mixed material, vacuum degassing before pouring may be enough. If air is trapped under transformers, inside coils, in deep cavities or around complex components, vacuum potting may be more effective.
| Método | What It Does | Suitable For | Limitation |
| Resting after mixing | Allows some bubbles to rise naturally | Low-viscosity, long pot life materials | Slow and limited for complex products |
| Vacuum degassing before pouring | Removes entrapped air from mixed silicone | Manual potting, simple products, small batches | May not remove air trapped inside the product |
| Staged pouring | Fills in layers to reduce trapped air | Deep cavities and simple structures | Slower process |
| Vacuum potting | Removes air from material and product structure | Transformers, coils, sensors, connectors, deep potting | Requires equipment and process control |
| Automatic dispensing control | Reduces air during metering and mixing | Mass production | Requires equipment matching and maintenance |
Buyer note: Do not assume that vacuum degassing alone will remove all bubbles. If the product geometry traps air, the process must help air escape from the product itself.
In a vacuum encapsulation process, degassing takes place during potting and can help remove air bubbles from the potting compound.
Common Mistakes That Make Bubbles Worse
Bubble problems often become worse when the process is adjusted in the wrong direction.
Avoid these common mistakes:
- Mixing faster to save time Fast mixing may introduce more air and create foam.
- Applying strong vacuum too suddenly Sudden vacuum may cause foam rise or overflow, especially in deep containers.
- Choosing high thermal conductivity without checking viscosity Highly filled thermal silicone may trap air if flowability is not suitable.
- Pouring from too high High pouring height can introduce new air into the material.
- Approving material only by cup test A cup test does not show whether the real product has internal voids.
- Using short pot life material for deep potting The silicone may become too thick before air escapes.
- Ignoring air inside automatic dispensing lines Bubbles may come from pump lines, refill process or static mixer issues.
- Blaming the material before checking structure and process Bubbles may be caused by component geometry or filling direction.
- Assuming surface bubble-free means internal bubble-free Cross-section inspection may still show voids under components or in deep areas.
Practical conclusion: Bubble control is a system issue. It depends on material, mixing, geometry, degassing and production process working together.
Testing Plan Before Mass Production
Before approving a silicone potting compound, test it in three levels.
A small cup test is useful, but it only proves that the material can cure. It does not prove that the real product can be potted without internal voids.
Level 1: Material Check
Use this level to understand how the silicone behaves before entering the product.
Check:
- A/B mixing quality
- mixed viscosity
- vida útil
- bubble release after mixing
- vacuum degassing behavior
- foam rise during vacuum
- tiempo de curado
- hardness after curing
Level 2: Product Structure Check
Use this level to confirm whether the silicone can fill the real product.
Check:
- real housing filling
- transformer or coil potting
- bubble location
- deep cavity filling
- wire outlet filling
- capacitor base filling
- cross-section inspection
- dielectric strength test
- temperature rise comparison
- insulation after humidity aging
Level 3: Production Process Check
Use this level before mass production.
Check:
- manual vs vacuum process comparison
- vacuum vs non-vacuum comparison
- automatic dispensing trial
- pump line air
- refill process stability
- static mixer compatibility
- A/B ratio stability
- line speed
- batch repeatability
- final product inspection
This three-level test helps separate material issues from product structure and production process problems.
If the Surface Is Tacky or Uncured, It May Not Be a Bubble Problem
If the surface remains sticky or uncured, read our troubleshooting guide on why RTV-2 silicone does not cure properly.
Sometimes customers describe a defect as “bubbles,” but the real issue is tacky surface or incomplete curing.
If the surface remains sticky, soft or uncured, the root cause may be different.
Possible causes include:
- wrong A/B mixing ratio
- incomplete mixing
- low curing temperature
- surface contamination
- expired material
- pot life exceeded before use
- platinum-cure inhibition
- contact with incompatible plastics, rubber, adhesives, tapes or chemicals
In this case, degassing alone will not solve the problem. The curing system and compatibility should be checked separately.
What to Send Topsil silicone for Troubleshooting
A supplier cannot identify the cause of bubbles from only one sentence: “There are bubbles in the silicone.”
To help Topsil silicone judge the possible direction faster, send the following information:
- Application: LED driver, power supply, transformer, sensor, connector, PCB module, etc.
- Current potting material type
- A/B mixing ratio
- Mixed viscosity or current TDS
- Potting depth
- Product structure photo
- Bubble location photo
- Cross-section photo, if available
- Short video of mixing or dispensing, if available
- Manual, vacuum or automatic potting process
- Degassing method
- Pot life and cure time
- Room temperature during potting
- Whether the material is thermally conductive
- Whether bubbles appear before or after curing
- Current supplier TDS, if available
- Estimated monthly usage
The most useful information is the bubble location photo and the current potting process. These help identify whether the issue is more likely related to material viscosity, product structure, degassing method or production equipment.
Topsil silicone Practical Recommendation
As a 15+ years RTV-2 silicone manufacturer, Topsil silicone usually checks bubble and void problems from three directions:
Material flowability: Is the viscosity suitable for the component layout, potting depth and filling method?
Product structure: Are bubbles appearing under transformers, around capacitors, inside coil gaps, near wire outlets or in deep cavities?
Potting process: Is the customer using manual pouring, vacuum degassing, vacuum potting or automatic dispensing?
Para electronics potting, bubbles are often not solved by changing only one factor. The suitable silicone grade should match the viscosity requirement, potting depth, component layout, degassing method and production process.
If bubbles or voids appear in your silicone potting process, send Topsil silicone your application, potting depth, bubble location photos, viscosity requirement, current process and product structure.
Topsil silicone can help recommend a practical RTV-2 silicone potting compound direction for testing.