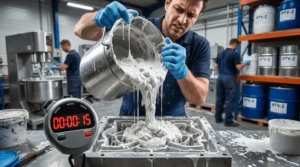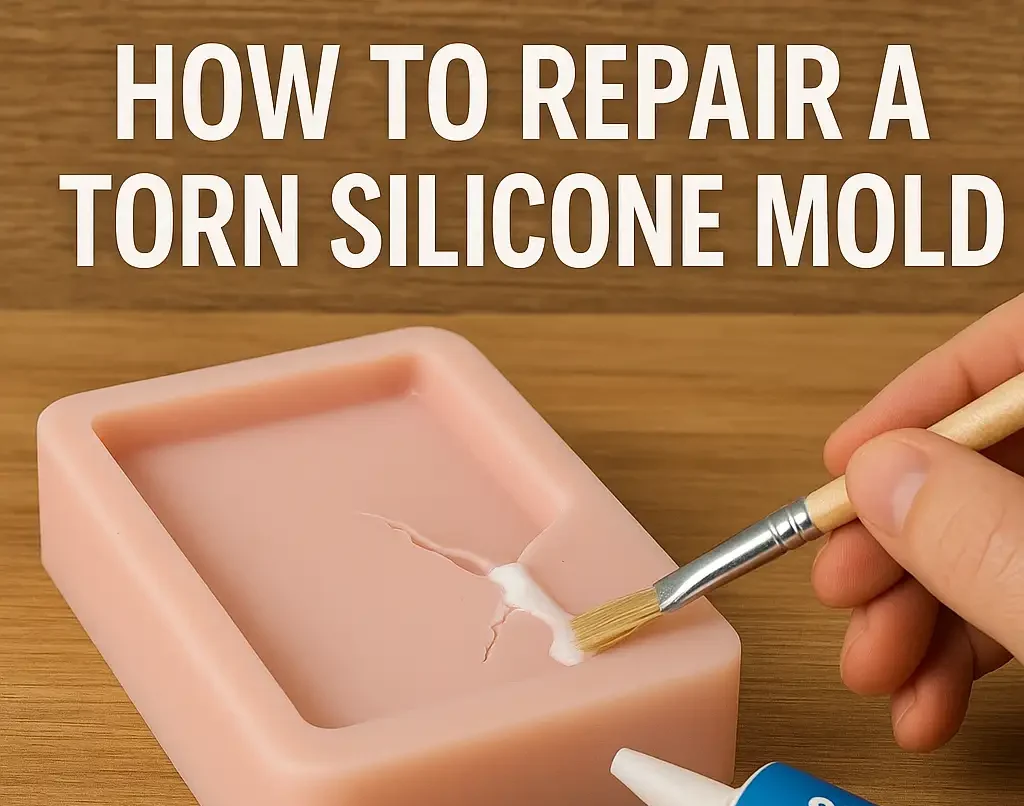

A torn silicone mold does not always mean it has to be thrown away. Small tears, split edges, and minor holes can often be fixed successfully when you know how to repair silicone mold tear and use the right method. The goal is not just to close the tear, but to restore its shape, maintain flexibility, and reduce the risk of the tear reopening.
Can You Repair a Silicone Mold Tear?
Yes, many torn silicone molds can be repaired, especially when the damage is small and located in a low-stress area.
Small side tears, minor edge splits, pinholes, and limited surface damage are often repairable. However, larger rips, repeated tears in the same area, or damage inside a critical detail cavity are much harder to fix successfully. If the mould is badly warped, sticky, brittle, or torn in multiple places, replacement is usually the better option.
In general, repair success depends more on the tear location, mold thickness, surface condition, and repair method than on any single factor alone.
Related Reading: Why Do Silicone Molds Tear Early? Causes, Fixes
When Does Repair Silicone Work Best?
A torn silicone mold is more likely to be repairable when:
The tear is small
The mold is still structurally sound
The damaged area does not flex heavily during demolding
The torn part is outside a highly detailed casting surface
The repair area can be kept stable during curing
Thicker molds are usually easier to repair than thin blanket-style moulds because they provide more bonding area and better support.
What You Need & What to Avoid
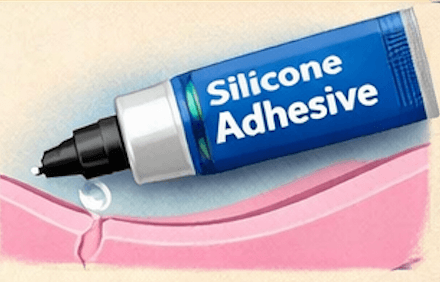
Before starting to repair silicone molds, gather the right materials. Ordinary household glue is usually not a good choice for silicone repair. Silicone is difficult to bond, and rigid adhesives often fail when the mold flexes.
| What You Need ✅ | What Not to Use ❎ |
|---|---|
| Silicone-compatible adhesive or repair material | Super glue on its own |
| Isopropyl alcohol or another suitable cleaner | Epoxy adhesives |
| Clean cloths or lint-free wipes | Hot glue |
| Small brush, spatula, or toothpick | General-purpose craft glue |
| Scissors or a craft knife | Rigid contact adhesives |
| Tape or light clamps | |
| Silicone patch if material is missing | |
| Reinforcement mesh or fabric for weak areas |
📖 How to Repair a Small Tear in a Silicone Mold?
Before applying any repair material, take time to assess the damage, clean the area properly, and make sure the mold keeps its correct shape. These steps are important because not every tear should be repaired in the same way.
Step 1: Inspect the Tear Carefully
Start by examining the damaged area closely.
Ask these questions:
- Is it a small tear, edge split, puncture, or missing section?
- Is the damage in a high-stress area?
- Is the mold thin or thick in that area?
- Will the repair affect casting detail?
- Is the rest of the silicone still in good condition?
This step matters because different types of damage require different repair methods. A small, clean slit may only need adhesive, while a larger hole or ragged tear may require patching and reinforcement.
Step 2: Clean the Damaged Area
Cleanliness is critical for a successful repair. Silicone repair material will not bond well to a surface contaminated with dust, oil, release agent, or casting residue.
Wash the damaged area gently if needed, then dry it completely. After that, wipe the torn edges with isopropyl alcohol and allow the surface to dry again. Make sure the mold is fully dry before applying any repair material.
If the tear edges are dirty, rough with residue, or coated with leftover release agent, the repair is much more likely to fail.
Step 3: Restore the Mold Shape
This is one of the most overlooked parts of silicone mold repair.
Before bonding the tear, make sure the mold is sitting in its correct shape. If necessary, support the damaged section from behind so the cavity geometry stays aligned during curing. In some cases, placing the original master or a temporary support inside the mold can help maintain the correct form.
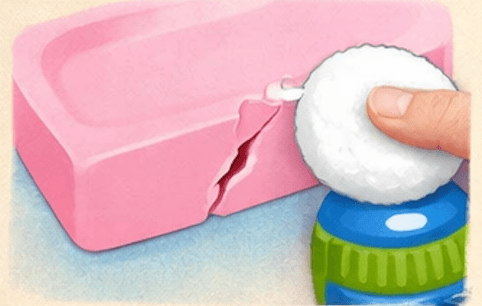
Step 4:Apply the Repair Material
Apply a thin amount of silicone-compatible adhesive directly into the tear. Use a toothpick, small brush, or similar applicator to spread it evenly without overfilling the area.
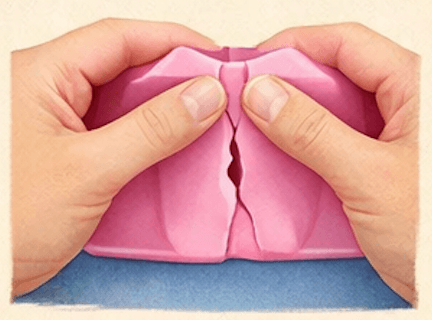
Step 5: Align and Secure the Tear
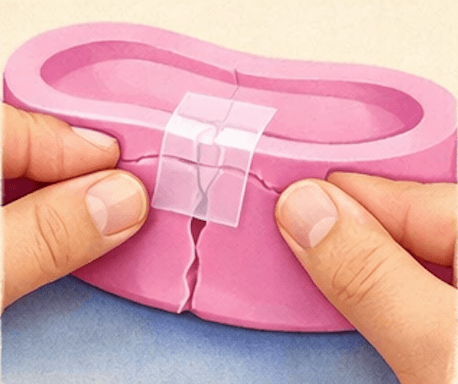
Then align the torn edges carefully. Press them together gently so the tear closes without forcing the silicone out of shape. If needed, use tape or a very light clamp to hold the area steady. Avoid applying too much pressure, because that can push the repair material out of the gap.
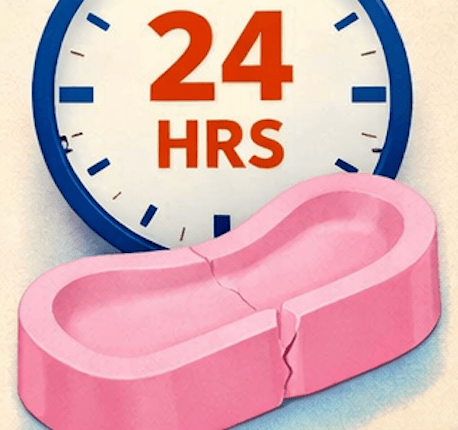
Step 6: Let It Cure Fully
Leave the mold undisturbed until the repair has fully cured. Even if the surface seems dry earlier, full curing often takes much longer than tack-free time. Always follow the product instructions and allow enough time before testing the mold again.
After curing, make a small trial cast before returning the mold to full use.
📖 How to Patch a Larger Tear or Hole?
When a torn silicone mold has missing material, a simple edge bond may not be enough. In that case, patching is usually the better method.
Step 1: Trim the Damage and Prepare the Patch
Start by trimming any ragged edges so the damaged area is clean and stable. Then prepare a patch from compatible silicone, ideally a similar silicone sheet or scrap material. The patch should extend beyond the damaged area enough to spread stress over a wider surface.
Step 2: Apply the Patch and Let It Cure
Apply silicone repair material to both the damaged area and the patch. Position the patch carefully over the tear or hole, smooth out any trapped air, and hold it in place with light support while it cures.
For deeper holes or areas with missing thickness, it may help to rebuild the section gradually rather than trying to bridge the entire defect in one heavy application. Smooth transitions around the patch edges are important, because sharp repair edges can create new stress points.
How to Reinforce a Repaired Silicone Mold?
Reinforcement is often the difference between a short-term repair and a durable one.
It is especially useful for:
edge tears
thin blanket molds
large repairs
Repeated-use moulds
molds used for heavy casting materials
molds used for heavy casting materials
One common method is to feather a thin layer of repair material beyond the damaged area. This helps distribute stress more evenly instead of concentrating it at the original tear line.
Another method is to embed open-weave mesh or reinforcement fabric into the repair layer before it cures. This creates a flexible support structure that helps resist repeat tearing. Reinforcement is particularly helpful when a tear occurs near an edge or in a thin unsupported section.
Why Some Silicone Mold Repairs Fail?
A torn silicone mold may fail again even after repair. This usually happens for one of several reasons.
The area may not have been cleaned properly. The adhesive may have been incompatible with silicone. The tear may have been in a high-stress area. The repair may have cured in the wrong shape. Or the mold may simply have been too thin or too damaged for the repair to last.
Another common problem is hardness mismatch. Even when a repair bonds well, the repaired area may feel slightly different from the rest of the mold. If it becomes too stiff or too weak compared with the surrounding silicone, that area can behave differently during demolding and fail again.
When Is It Better to Replace the Mold?
Sometimes repairing silicone mold tears is possible, but still not worth doing.
Replacement is usually the better choice when:
the mold has multiple tears
The silicone feels sticky, weak, or degraded
The tear runs through a critical cavity detail
The repaired area would be exposed to repeated stretching
Casting accuracy matters more than saving the mold
The same area has already failed before
A repaired section can still work, but it may remain more vulnerable than the original mold. When the damage is too severe, replacing the mold is often the more reliable and cost-effective solution. In that case, using a high-quality mold-making silicone can help you achieve better durability and cleaner castings.
Repair Silicone Mold FAQ
Can you repair a torn silicone mold?
Yes, many torn silicone molds can be repaired if the damage is small, the mold is still in good condition, and a silicone-compatible repair material is used.
What glue works on silicone molds?
The best option is usually a silicone-compatible adhesive or repair product designed specifically for bonding cured silicone. Ordinary household glues usually do not perform well.
Can I use super glue on a torn silicone mold?
It is usually not recommended. Super glue tends to become brittle and often fails when the mold flexes.
Should I patch a hole or just fill it?
Small punctures may only need spot repair, but larger holes usually perform better with a patch and, in some cases, reinforcement.
When should I replace instead of repair?
Replace the mold when it has multiple tears, sticky degradation, poor casting accuracy, or repeated failure in the same area.
How Long Should You Let the Repair Cure?
Always wait until the repair has fully cured before using the mold again. A dry surface does not always mean full strength, so avoid moving or flexing the repaired area too early.