Fabricación de moldes de silicona and resin casting demand absolute surface perfection. There is nothing more frustrating than breaking open a cured production mold only to find the critical cavity surfaces riddled with micro-bubbles, craters, and structural voids. These microscopic defects don’t just ruin the cosmetic finish; they create severe weak spots that cause the mold to tear prematurely under production stress.
Whether your shop floor is equipped with a professional industrial vacuum setup or you are looking for advanced workbench tricks to minimize air entrapment without extra machinery, this comprehensive guide outlines the exact cross-linking mechanics, mixing protocols, and troubleshooting steps needed for a flawless fill.
Why Do Bubbles Form in RTV-2 Silicone?
Before implementing a degassing protocol, process technicians must understand the mechanical causes of air entrapment. Liquid silicone rubber does not generate gas on its own; air is introduced entirely through external processing and environmental factors:
- Aggressive Mechanical Whipping: Fast stirring acts like a whisk, pulling large pockets of atmospheric air directly into the dense viscous liquid.
- The Viscosity Buoyancy Trap: Silicones with a high viscosity (anything above 30,000 mPa·s) possess incredibly low bubble buoyancy. The air bubbles move too slowly to rise and escape before the pot life clock runs out.
- Porous Substrate Off-Gassing: Pouring liquid silicone over unsealed, porous master models (like dry wood, plaster, or foam) causes the air trapped inside the substrate to vent outward, creating fresh micro-bubbles at the mold interface.
- Thermal Expansion Spikes: Curing silicone at elevated workshop temperatures causes any tiny, microscopic trapped air bubbles to expand dramatically in volume, compounding the defect size during cross-linking.
Need the right RTV-2 silicone grade?
If you are facing tearing, bubble, or curing issues, send us your application details. Topsil will recommend the perfect grade for testing.
The Advanced Two-Container Mixing Protocol (Double Potting)
To minimize air before you even touch a vacuum chamber, your workshop must abandon standard rapid whisking and adopt the industrial Double Potting Method.
- Precision Dosing: Measure Part A and Part B precisely on a digital scale based on the exact weight ratio on the TDS.
- The First Fold: Use a flat-edged spatula. Instead of whipping, use a deliberate stretch-and-fold motion, ensuring you scrape the flat bottom and vertical walls of the container continuously.
- The Transfer (The Secret Step): Pour the mixed silicone into a completely fresh, clean second container. Leave the sticky, unmixed silicone residue clinging to the walls of the first cup behind.
- The Final Blend: Mix again for 60 seconds using the same gentle folding motion. This ensures 100% homogeneity and eliminates uncatalyzed wet spots without whipping extra air into the batch.
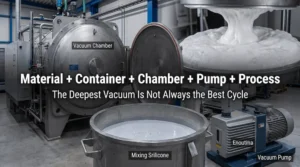
Cómo desgasificar la silicona con una cámara de vacío
A clear-lidded vacuum chamber combined with a strong pump is the ultimate insurance policy for professional mold makers. It reduces degassing times by over 60% and guarantees zero-defect cavities.
The Bench Equipment Requirements
- A High-Rise Mixing Container: The mixing bucket should only be filled one-third of the way. Silicone will expand up to three times its original volume under vacuum before collapsing.
- A Dual-Stage Vacuum Pump: Your pump must be capable of pulling a deep vacuum of at least 29 inHg (approx. 98 kPa) to force high-viscosity rubbers to expand and vent efficiently.
The Standard Degassing SOP
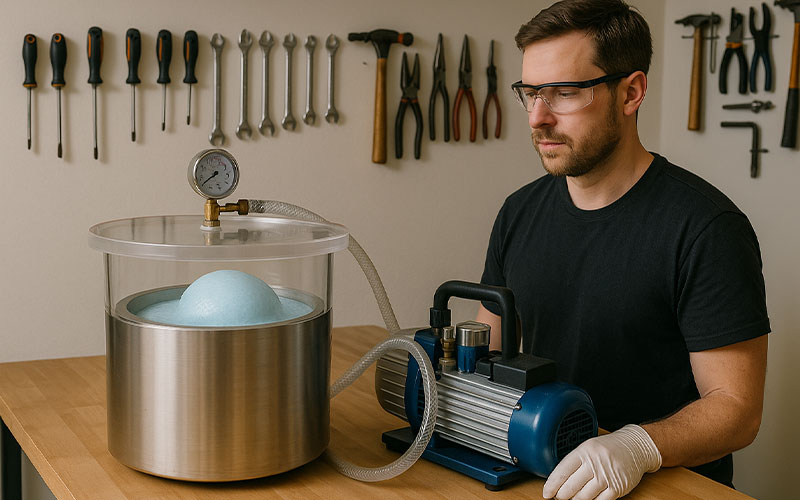
- Step 1: Place your one-third filled, wide-mouth container dead-center inside the vacuum chamber and seal the clear lid.
- Step 2: Fire up the pump and open the vacuum valve gradually. Watch the silicone rise through the clear lid. If it expands too fast and threatens to boil over the rim, quickly crack the relief valve to vent the chamber and drop the foam level.
- Step 3: Once the silicone hits its maximum expansion height, it will experience a sudden “catastrophic collapse.” The giant foam head will burst, and the liquid level will drop back down.
- Step 4: Continue pulling a full 29 inHg vacuum for an additional 2 to 3 minutes after the collapse to pull out any remaining micro-bubbles.
- Step 5: Release the vacuum valve slowly to prevent sudden air turbulence from disturbing the smooth surface, and pour the degassed silicone immediately while the pot life window is open.
⚠️ The Crucial Temperature Trap: While warming thick silicone parts in a warm water bath to 30°C lowers viscosity and helps bubbles rise, heat drastically accelerates the vulcanization chemical reaction. If you warm a fast-curing silicone, it can snap-cure inside the vacuum chamber during the expansion phase, trapping 100% of the bubbles permanently. Only warm low-viscosity, long-pot-life silicone grades.
How to Minimize Bubbles Without a Vacuum Chamber
If your workshop doesn’t have a vacuum pump, you can still achieve near-perfect production molds by manipulating fluid dynamics:
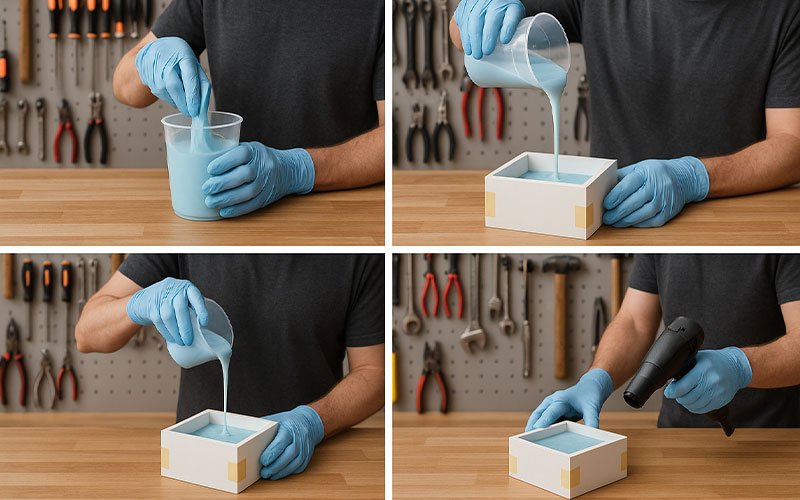
- The High-Altitude Accordion Pour: Raise your pouring container 2 to 3 feet above the mold box. Pour the silicone in a continuous, razor-thin string-like stream into a single low point of the box. This extreme stretching flattens and bursts the vast majority of air bubbles before they even hit the master model.
- The Detail Face Coat (Pre-Brushing): Before running your main pour, dip a stiff brush into the mixed silicone and aggressively paint a thin “face coat” over all intricate text, sharp corners, and deep undercuts of the master. This physically displaces air from tight corners where bubbles love to hide.
- Dwell Deflation (The Lazy Bench Trick): If you are using a silicone grade with a long pot life (above 60 to 90 minutes), simply let the mixed container sit flat on the bench for 10 to 15 minutes before pouring. The large bubbles will naturally migrate to the surface and pop on their own.
Troubleshooting Air Bubble Failures
| Concrete Symptom | Root Production Cause | Immediate Workshop Fix |
| Micro-bubbles clustered on the master surface. | The master model is porous and wasn’t sealed properly before pouring. | Coat porous masters (wood/plaster) with acrylic sealer or pore-filler. |
| Silicone boiled over the mixing container during degassing. | The container was overfilled or the vacuum valve was opened too aggressively. | Never fill pails beyond one-third capacity; cycle the relief valve to manage the foam rise. |
| Large air pockets trapped in deep internal corners. | The silicone was dumped directly over the top of the model, trapping air beneath it. | Always pour from a single low point and let the fluid rise naturally around the piece. |
| Persistent cloudiness or uniform fine bubbles. | The workshop environment is too cold, causing the silicone viscosity to skyrocket. | Maintain a controlled ambient room temperature of 22°C to 25°C for optimal flow. |
RECOMMENDED NEXT STEP
Grade issue or processing error?
Send your data, photos, and target hardness. We’ll find the cause and recommend the right RTV-2 grade.
Send Problem Details